ClockWise HRGuideAdding an employee
Adding an employee
A two-step form: who the person is, then where they work. If your account cannot set pay, the second step has no salary fields at all — and the new file is saved as hourly at zero until somebody who can fills it in.
Have these ready: the person’s full name, the branch they work at, their department and sub-department, their level, and the date they started.
Your account must be allowed to add employees, and the branch must be one your account covers — the form offers no others.
1Open the form
In the menu on the left, under Company, click Employees, then Add Employee above the list.
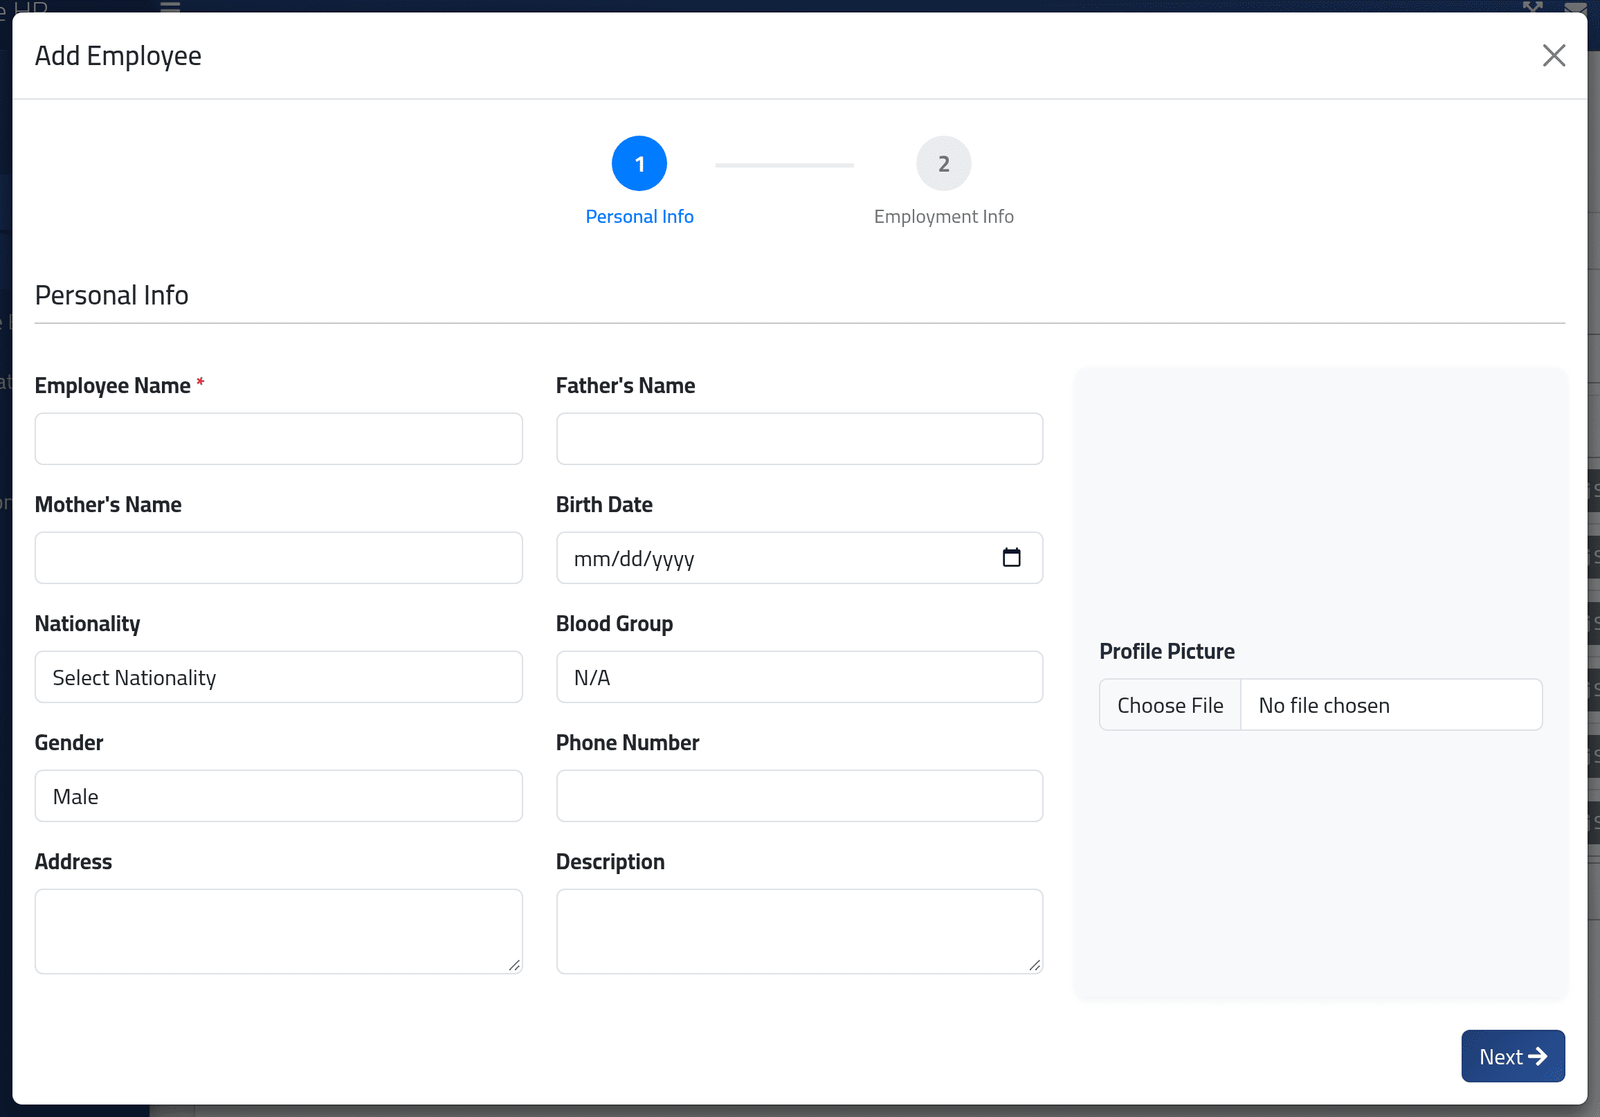
The form opens on step 1, Personal Info.
2Fill in who they are
Only Employee Name is required. Everything else on this step — the parents’ names, Birth Date, Nationality, Blood Group, Gender, Phone Number, Address, Description and a Profile Picture — can be added now or later.
A phone number typed here becomes the person’s default contact. See Contacts.
Click Next.
3Say where they work
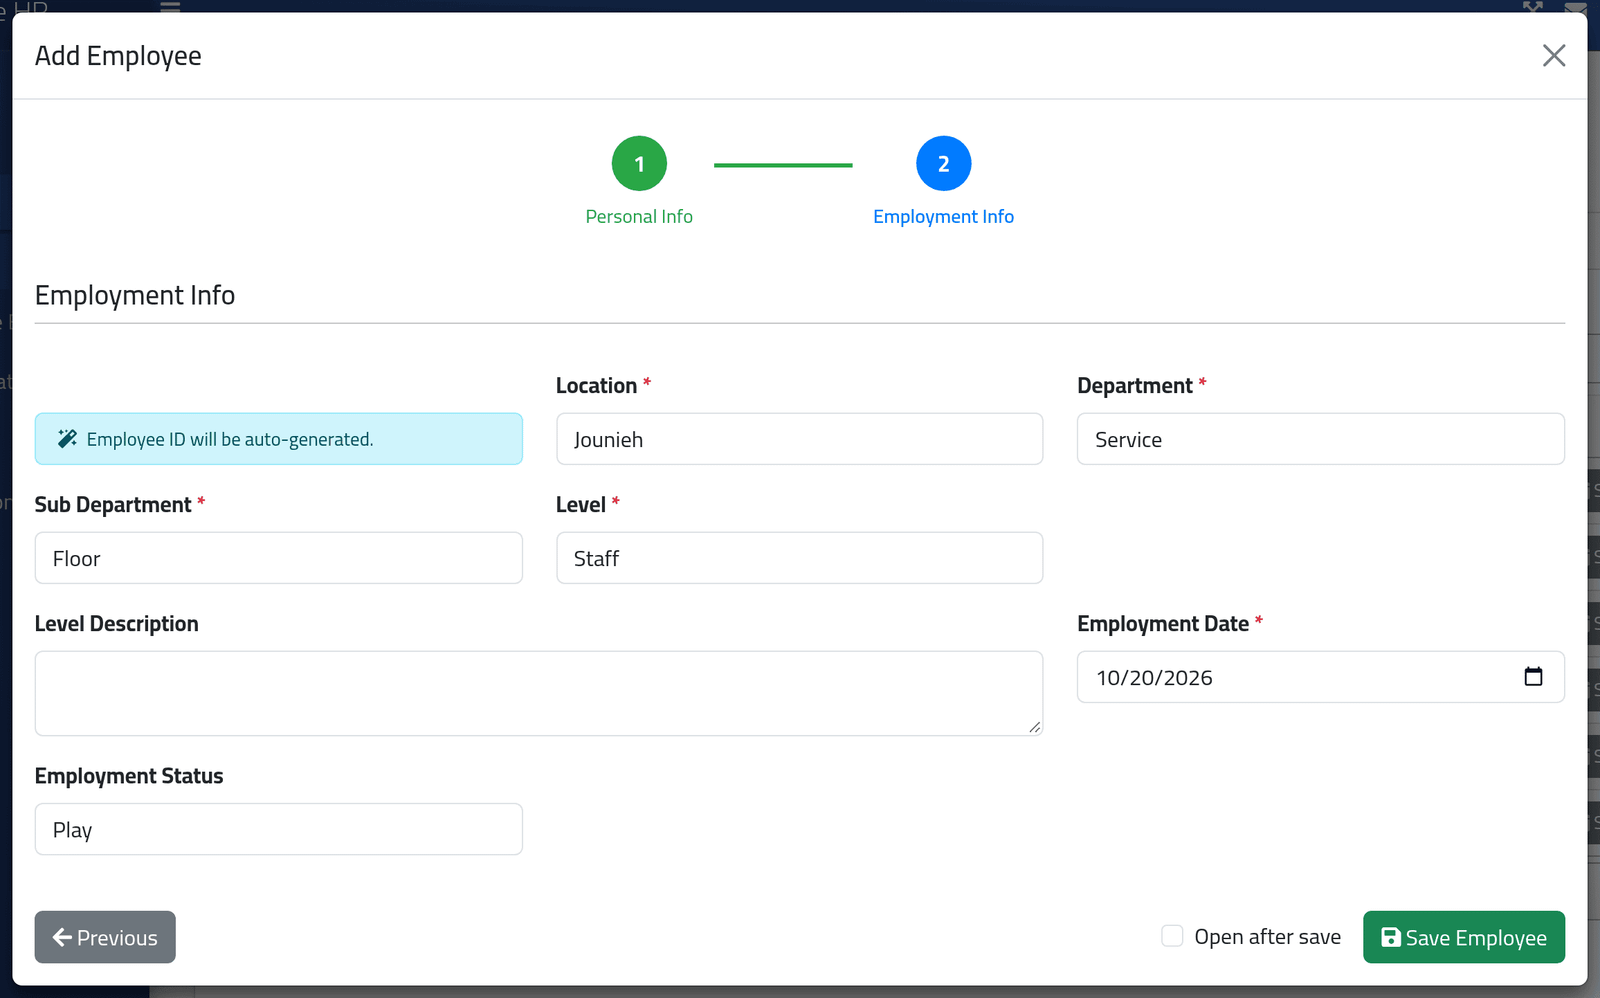
Step 2, Employment Info:
- Location — the branch. Only branches your account covers are offered.
- Department, then Sub Department. The second list fills in once you have chosen the first.
- Level, and an optional Level Description.
- Employment Date — the day they started.
- Employment Status — leave it on Play for somebody who is working.
Date boxes show dates in your browser’s own order. In the picture, 10/20/2026 is 20 October 2026.
4Check the employee ID
If your company numbers employees automatically, the form says Employee ID will be auto-generated. — the next free number is used. Otherwise there is an Employee ID box, and it is required.
The employee ID is the number the clocking machine knows this person by. Their punches are matched to their file by it and by nothing else. Whoever enrols the person on the machine must use exactly this number — check it on the person’s file after saving.
5Salary — only if your account can set pay
If your account is allowed to set pay, step 2 also shows Salary Type, Amount / Rate, Currency and a few reference fields. They are explained in Setting an employee’s pay.
The picture is an HR officer’s form: none of those fields are there.
When the salary fields are not on the form, the employee is saved as hourly, at a rate of zero. Their attendance is recorded normally, but they will be paid nothing until somebody who can set pay opens their Salary Info and fills it in. Tell that person the same day.
6Save
Tick Open after save if you want to go straight to the new file. Click Save Employee.
What happens next
The new person is on the employee list, with status Play.
They have no schedule yet. Until they are given one, ClockWise cannot tell which shift their punches belong to, and every day of their attendance shows the error Missing schedule. Give them a schedule straight away — see Giving someone a schedule.
If it goes wrong
| What you see | What it means |
|---|---|
| A box saying Please enter Employee Name | Step 1 needs a name before Next works. |
| The branch you need is not in Location | Your account does not cover that branch. See Deciding what someone can see. |
| Sub Department is empty | Choose the Department first. |
| The employee id has already been taken. | Another file already uses that number. Search the list for it before using a different one. |
| The new person does not appear on your list | You saved them in a branch your account does not cover. |